It’s raining. The sun has set. Your GPS had died and you need to get this leg of the journey to your bug out retreat over with already, but the road closure detour wasn’t planned. You have a vague idea of how to navigate back to your original route, but the road signs are misleading and nonsensical and there is no one around at this time of night to ask for directions. You’re not exactly sure you would want to stop anyway with the signs of desperation on the faces of some people when viewing you and your vehicle drive by.
All your plans can be for nothing if some disruption prevents you from getting safely to your destination. You have always practiced the mantra of two is one and one is none when it comes to redundancy. Technology is great, but it can fail. Signals can be lost. GPS Service could be taken offline, your battery could die. When all else fails, do you know how to read a road map?
OK, so this may be a pretty extreme example but if you are bugging out or maybe something less serious like traveling overland, knowing how to read a road map is as integral to the smooth flow of your trip as having the experience and equipment to change a tire. Even if you have gone off-grid in search of a different type of self-reliance – an opportunity to liberate yourself from any dependence on a GPS system, before leaving, you need to know how to read a road map.
Reading a road map is easier than you think and it is a skill that can save you not only time but trouble on the open road.
We have broken down how to read a road map down into six easy steps. With this information, you can be prepared if something goes wrong to use your fallback navigation system.
Step 1 – Get The Right Road Map


Topographic maps are perfect for situations where the normal roads can’t be counted on. These are good backups, but most people can rely on a trusty road atlas.
When you think about it maps can serve a multitude of purposes; a hiker will need a different set of information from a driver and a farmer will need a different set of information from a fisherman. In that sense, no two maps are created the same.
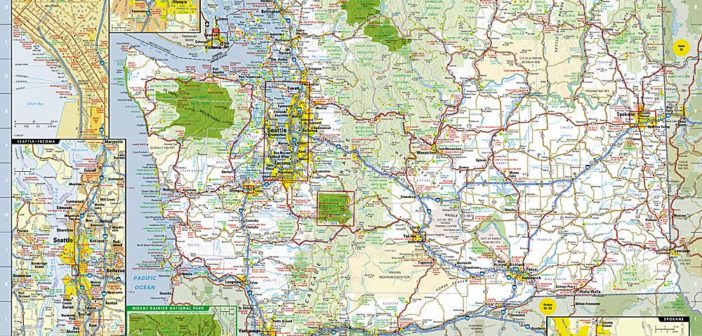
What type of map do you need? You have guessed it, a road map. On top of this, you need the most up to date road map available. Infrastructure and roads are being developed everywhere on a continuous basis and the lay of the land can change dramatically from year to year.
If it is not possible to buy a printed fold-out road map for a certain leg of your journey then turn to Google Maps in advance. Print out the sections of the map you need and keep them tucked away should the time come that you need to use it. You could organize these maps in a binder to keep them arranged logically and easy to find.
Step 2 – Orient the map
Understanding which way is up on a map is really important. Up? No, north, south, east, and west are the directions you use on a map. Regardless of what direction you are looking at on the land itself the top of the map is always north, you can assume that this is the case even if there is no compass rose on the map.


Step 3 – Reading the map scale
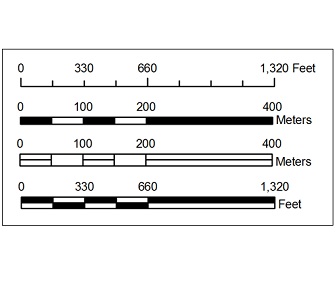
The scale of the map is important to get your head around too. The scale of the map indicates the ratio of mapped distance to actual distance. This ratio and scale differ from one map to the next. The scale will feature on a map even if the compass rose does not. On a ‘proper’ map (e.g, not hand-drawn) you will find both a compass rose and a scale.


For example, you measure your points A to B on a map (we’ll go through that in a minute) and it measures 5 inches (12.7cm) and your map’s scale is 1: 190,000 in order to find out the actual distance from A to B can be worked out like this;
5 x 190,000 = 950, 000 inches
One mile = 63, 360 inches
So, 950, 000 ÷ 63, 360 = 14.9 miles.
The only number you need to remember is 63,360; the number of inches in a mile.
If you work in kilometers then also remember that 1-mile is 1.6km so, in this instance, 14.9-miles would be 23.9km.
Step 4 – Contour Lines
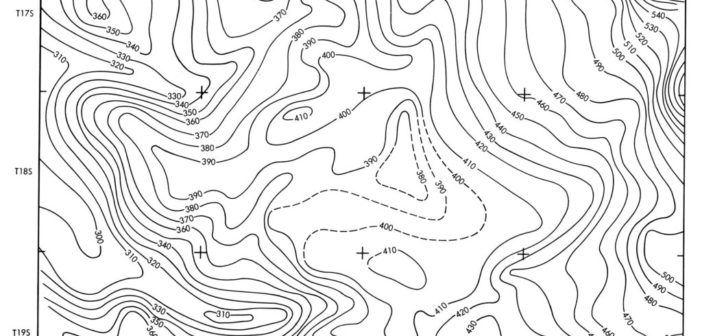
Reading contour lines is an important skill to have even if your journey covers flat territory. Contour lines indicate how high or low the terrain is and each line represents the distance above sea level each location is.
It is easy to remember, the closer the contour lines are to each other the greater the gradient, the steeper the land.


A contour map is a map illustrated with contour lines, for example, a topographic map, which thus shows valleys and hills, and the steepness or gentleness of slopes.
The further apart the contour lines are from one another the flatter the gradient, the flatter the land.
If you are driving through mountainous regions you need to pay attention to contour lines, especially if you wish to estimate your journey time.
Step 5 – The Map Legend
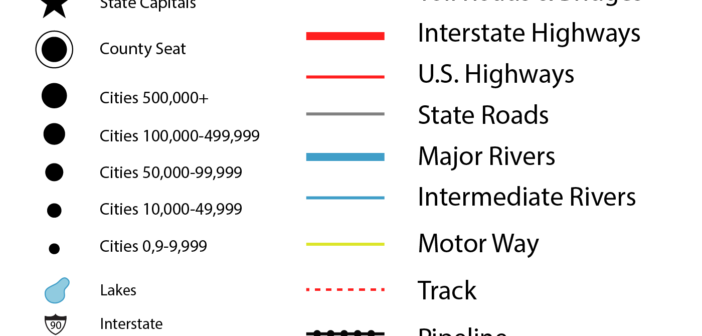
Sadly not as exciting as the name would suggest but, we have to admit, one of the most useful parts of the map. Arguably, no map will make much sense without a legend. The legend explains what all the different symbols, styles of lines, and color gradients mean on the map in front of you. Again, just as with a scale, the legend on every map is different but there are some standard symbolic depictions that most follow.
Mountains are generally depicted in shades of green or brown, with a white section showing a snow-capped peak; commonsensical really. The darker areas are the lower sections of the mountain that get greener or a lighter shade of brown as you reach the higher areas.


Any bodies of water such as ponds, lakes, rivers, or oceans are depicted in blue; again, commonsensical.
Forests, woodlands, park areas, and even golf courses are colored green, these will be a universal block of green rather than the changing shades of green you find in areas of the maps showing mountains.
Buildings and residential areas are shown as black or gray blocks with the borders shown in hues of pink or sometimes yellow.
It may seem rather self-explanatory but if the language of the legend is foreign to you then knowing the standard legend rules can help you figure out what is happening on your road map.
Step 6 – Using Your Map!
So now you know how to read your map you need to know how to use it. Get your pencil at the ready!
If you can’t locate your start or endpoint on the map just by looking flick to the back of your road map and use the index to find out what page or pages your start/endpoint is on. The index will be in alphabetical order and will inform you of both the page number and the grid reference for each named place.
What is a grid reference and how to use them?
A grid reference helps you pinpoint an exact point on a map. The X-axis runs along the horizontal edge of the map and the Y-axis along the vertical. A grid reference for a road map will generally use four figures, walking maps use six.
In a four-figure grid reference, the two figures on the X-axis are first followed by the Y-axis.
E.g say you are looking for the rural Cotswold village of Bibury, UK. You flick to the index and see that it is on page 34 grid reference 2437.
You flick to page 34 and follow the X-axis to 24 and the Y-axis to 37. Trace, using your fingers, until they meet and you will have found Bibury on the map.
How to Get from A to B using a map
So now you know how to pinpoint your start and endpoint on a map now you need to know how to get from A to B.
To map your journey out the traditional way you will need a piece of string. Put one end of the string at the starting point, and then follow the route of the roads, as best you can, to point B. Then mark the string where it meets point B, remove the string from the map, and measure.
Like we did in the equation in Step 3, use the string to work out the exact length of your journey.
A reminder for you here;
If your journey measures 5 inches (12.7cm) and your map’s scale is 1: 190,000 in order to find out the actual distance from A to B can be worked out like this;
5 x 190,000 = 950, 000 inches
One mile = 63, 360 inches
So, 950, 000 ÷ 63, 360 = 14.9 miles.
The only number you need to remember is 63,360, the number of inches in a mile.
Keeping Note
If you are driving solo then it is best to make a note of the road names and junctions that you will need to enter and exit the highways with. If your travel buddy can’t read a road map (send them this article!) then it is an equally good idea to have a list of notes that they can refer to to help you both on your journey.
Remember, don’t try and read a map while driving. Pull up in a safe spot and concentrate on reading the map so you can then concentrate on the road ahead!


